Direct answer (120–180 words)
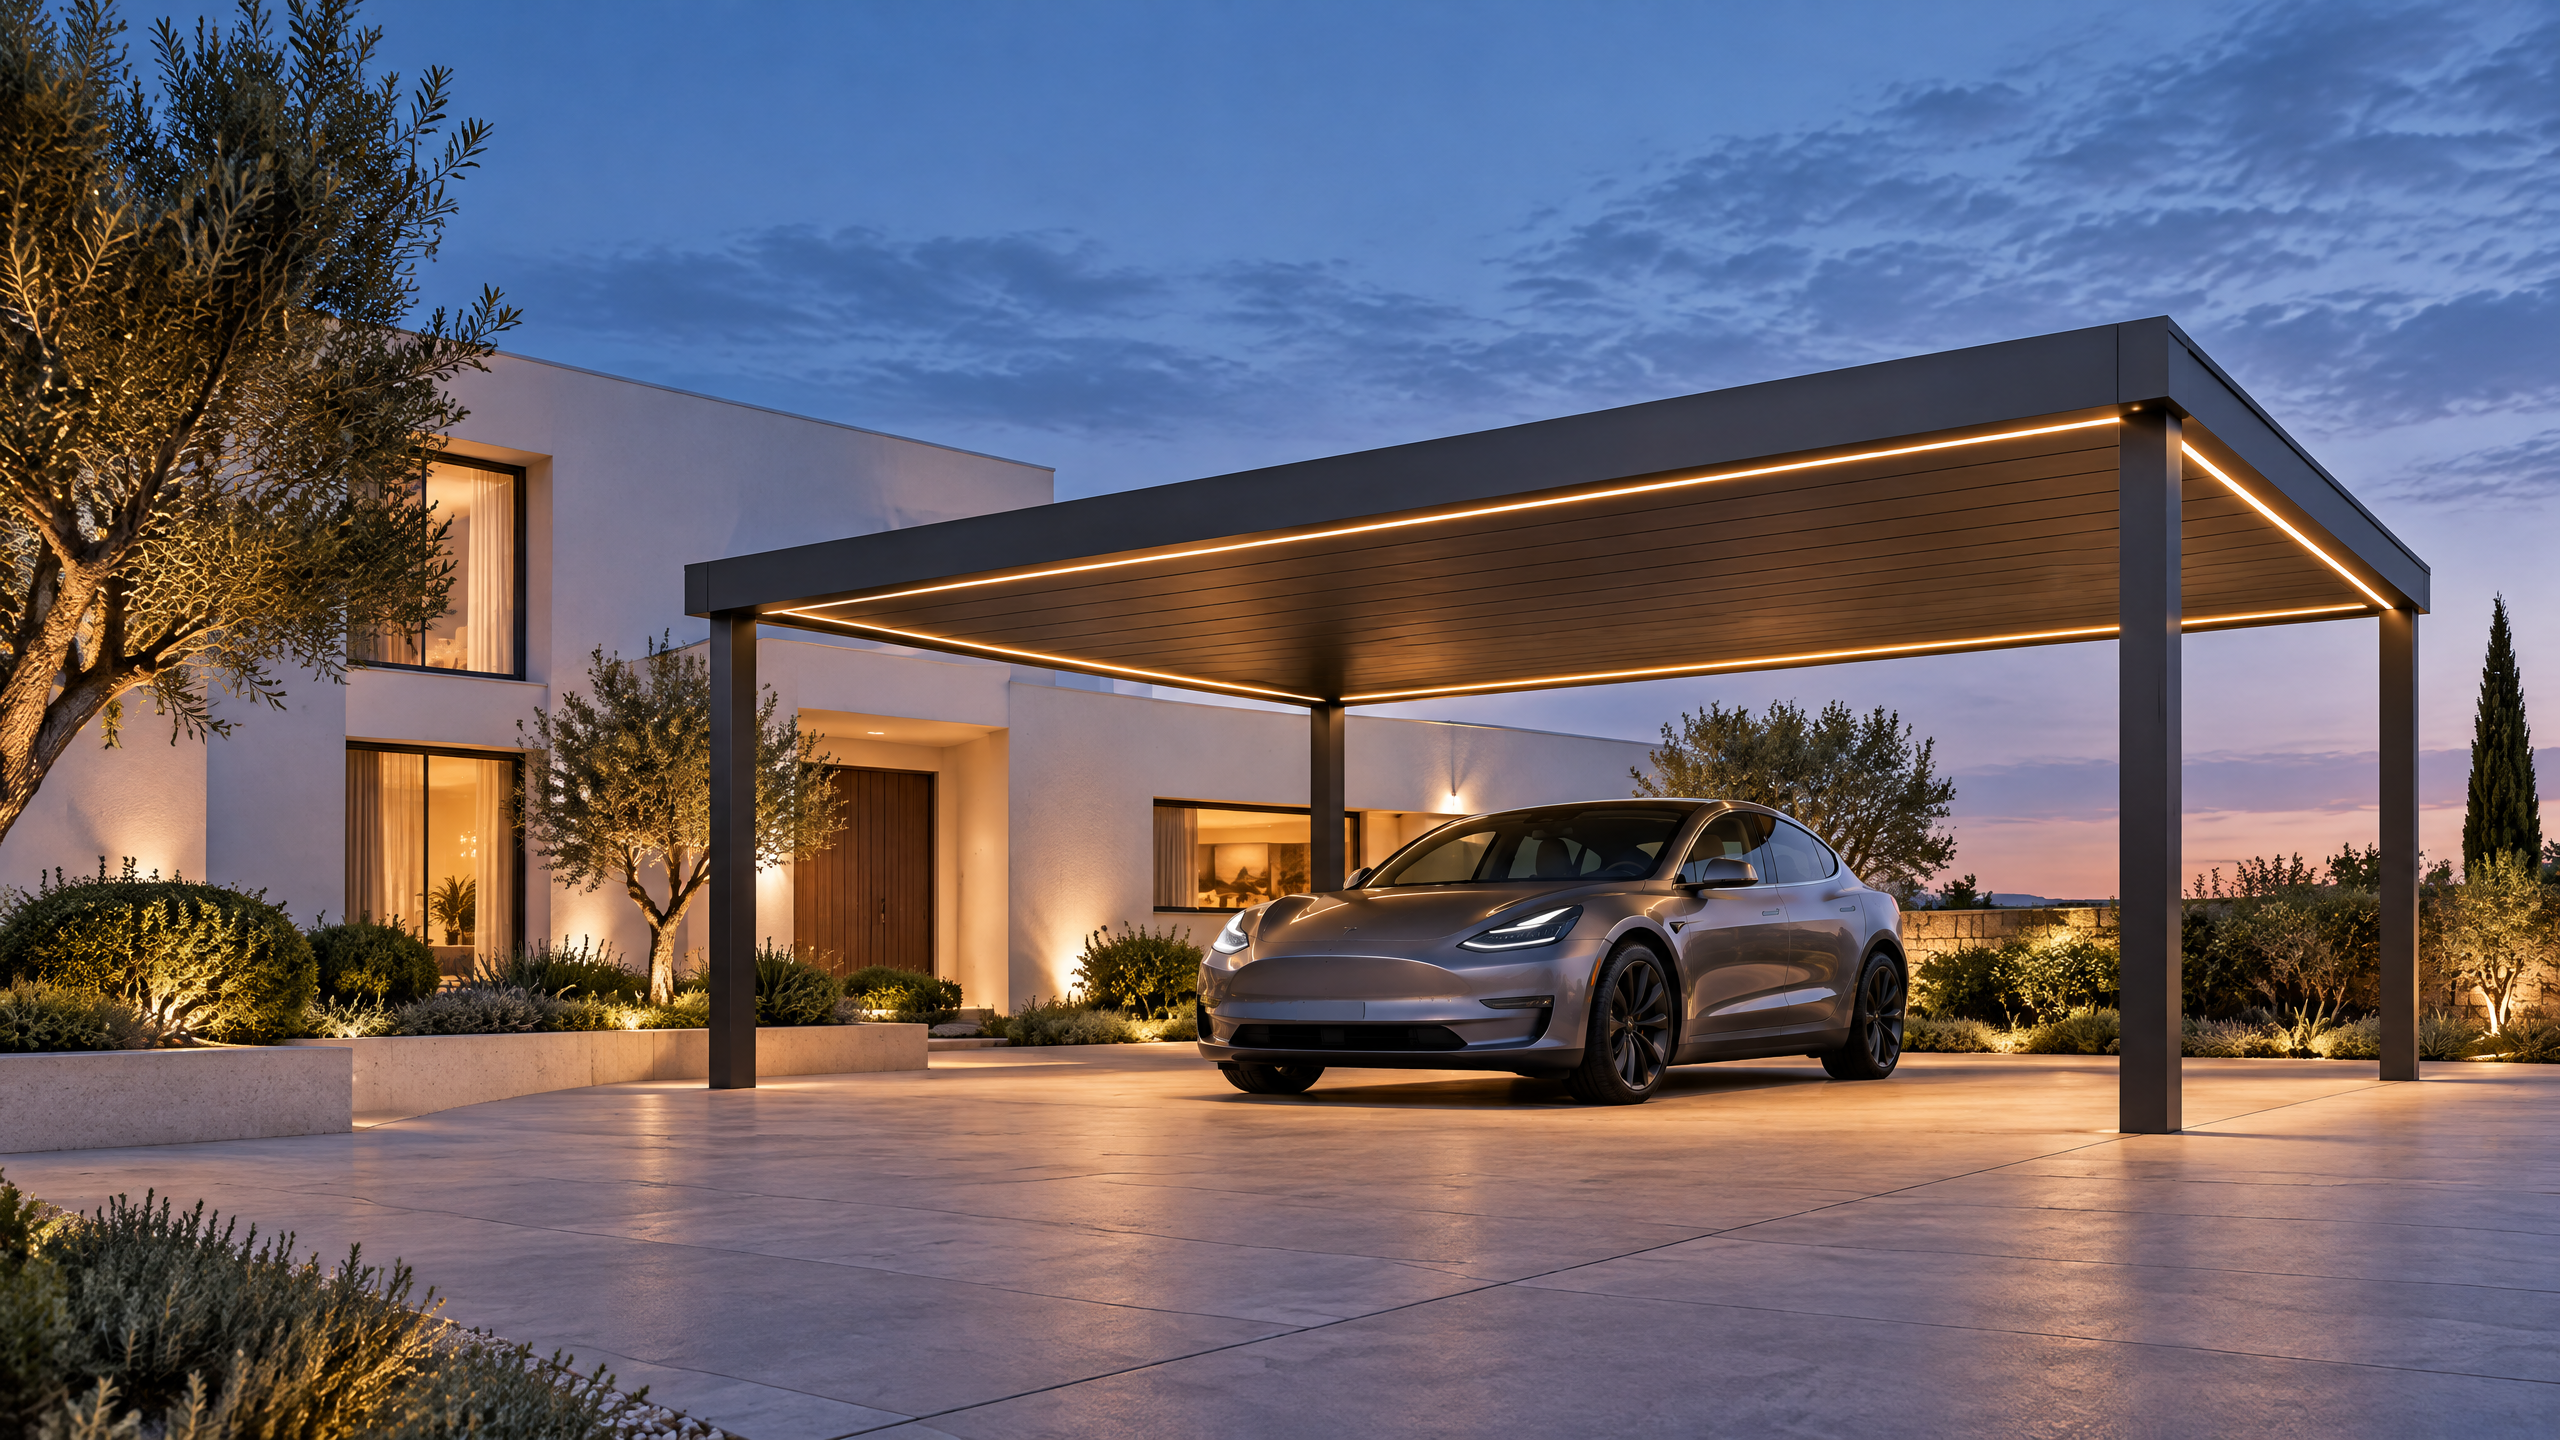
Villa carport integrated lighting should be treated as a systems decision, not an afterthought. Project teams must confirm the lighting concept meets architectural intent, structural and drainage interfaces, electrical design and safety requirements, service and maintenance access, procurement evidence, and installation readiness before committing to manufacture or site works. For villa carport integrated lighting this means agreeing the illumination targets (lux, uniformity), luminaire types and ingress/impact protection, driver and control locations, cabling routes and connection details, thermal constraints within aluminium profiles, roof drainage coordination with lighting channels, finish and fastener compatibility, and a documented shop drawing review cycle that includes thermal, electrical and mounting checks. Procurement should require factory inspection evidence, sample finishes and a defined warranty scope referenced to a documented project basis. For integrated solutions Carportiva recommends reviewing the NordFlat architectural villa system as a basis for specification and coordination with broader architectural aluminium systems.
Buyer context and scope boundary
Purpose and audience
- This guide is written for B2B decision makers—distributors, architects, contractors, developers, solar EPCs and fleet operators—responsible for specifying, procuring and delivering villa carport integrated lighting as part of an architectural aluminium carport system.
- It assumes the team controls or influences architectural, structural and electrical workstreams and must coordinate across them.
Scope boundary
- Primary focus: lighting physically integrated into the carport structure (roof modules, gutters, beam profiles, soffits) on villa and residential-scale carports.
- Excluded: standalone pole-mounted lighting and photovoltaic electrical design details for solar generation beyond cabling interface points for luminaire power; specialised emergency lighting certification processes (those require local electrical authority input).
- Site-specific constraints (structural capacity, foundations, permits, electrical design, approvals, lead time, price, energy yield and warranty) require a documented project basis and engagement with relevant local qualified professionals, installers, utilities and authorities before acceptance or sign-off.
Cluster
- This guide sits within Architectural aluminium systems and assumes familiarity with aluminium fabrication, powder-coating practice and common architectural coordination workflows.
Core decision principle
Decide on integrated lighting by balancing three interdependent objectives:
- Architectural outcome — visual quality, concealment, and finish consistency with the carport design.
- Performance and safety — required illuminance, maintenance access, electrical safety and environmental protection.
- Deliverability and cost-risk — procurement clarity, factory verification, site assembly complexity and long-term serviceability.
If any single objective is unconstrained (e.g., architectural desire without verification of thermal or drainage interfaces), the risk of costly change increases. The correct decision point is the documented project stage when the design team can sign off on the combined architectural carport specification, electrical schematic and shop drawing review outcomes.
Planning inputs: what the team must gather early
Assemble this minimum evidence package before final procurement:
- Site data
- Orientation and solar exposure
- Predicted wind and snow loads (for structural co‑design) — reference local codes and Eurocodes for calculation frameworks [1]
- Site drainage paths and fall directions
- Architectural brief
- Desired levels of concealment for light sources
- Visual alignment with building facades and materials
- Finish schedule and color targets
- Lighting brief
- Target horizontal and vertical illuminance values (lux) and uniformity ratios
- Circadian / colour rendering needs (CCT / CRI)
- Controls strategy: occupancy, daylight dimming, zone control, and emergency lighting
- Electrical brief
- Point-of-supply location, available breaker capacity, and required protection
- Preferred conduit or trunking routes and access for future maintenance
- Voltage class (e.g., local mains), driver location and any requirement for remote driver enclosures
- Maintenance and service plan
- Access for lamp/driver replacement and cleaning
- Expected maintenance intervals and owner responsibilities
- Regulatory and approval constraints
- Local electrical code interpretations (work with local authorities)
- Planning conditions that may define external lighting limits or dark-sky requirements
Collecting these inputs early reduces iterative redesign, avoids late-stage component substitutions, and clarifies procurement evidence to require from suppliers.
Technical specification and interfaces
This section translates the planning inputs into verifiable technical requirements.
Key technical parameters
- Luminaire performance
- Lumen output and optical distribution to meet lux/uniformity.
- CCT and CRI per design brief.
- Emergency lighting options if required.
- Environmental protection
- Ingress protection (IP) and mechanical impact (IK) ratings appropriate to exposure and cleaning regimes.
- Corrosion class selection for coastal or chemically aggressive environments—align alloy and finish choices with guidance from material standards [2].
- Thermal management
- Luminaire and driver heat dissipation requirements; verify that enclosed aluminium profiles do not cause driver over-temperature.
- Electromagnetic compatibility and driver performance
- Drivers should comply with applicable EMC and electrical safety standards (refer to project electrical engineer and local regulations).
- Structural interface
- Fixing points, load paths and stiffness of aluminium profiles; confirm with structural calculations per Eurocodes where applicable [1].
Interface checklist (must be confirmed in the shop drawing review)
- Fixing and anchor detail to primary structure.
- Cable entry/exit details, grommets and strain relief.
- Sealing between luminaire housings and roof/water channel to prevent ingress and avoid roof drainage blockages.
- Thermal movement allowances between aluminium profiles and luminaires.
- Finish adjacency and potential galvanic corrosion interfaces between differing metals—ensure finish and fastener compatibility.
In projects using modular systems, aluminium profile details determine both aesthetics and functional capability to accept integrated luminaires—see the section on aluminium profile selection.
Architectural carport specification: integrating lighting and structure
Integrating lighting into an architectural carport requires the carport schedule to include lighting as a design element in the carport's architectural carport specification.
What to include in the architectural carport specification
- Definition of integrative concept: recessed strip, concealed slot, exposed lens or backlit soffit.
- Acceptable luminaire models (or performance envelope) and control system compatibility.
- Mounting tolerances: permitted offsets, vertical and horizontal alignment, and lens flushness.
- Drainage and waterproofing strategy where channels pass luminaire modules—explicit roof drainage coordination requirements.
- Finish and fastener compatibility: specify compatibilities to avoid dissimilar metal corrosion and differential finish performance over time.
- Access and replacement strategy: whether luminaires are replaceable from below, require roof access, or are field-replaceable without module removal.
Aluminium profile selection
- The phrase aluminium profile selection must be addressed explicitly in the specification: provide a list of approved profile geometries and cross-section drawings showing luminaire recesses, cable channels and fixing slots.
- Profiles must provide mechanical support, desired sightlines, and adequate ventilation for heat. Confirm extrusion temper and alloy to meet structural and fabrication needs; consult material guidance from the Aluminium Association for alloy and temper considerations [2].
Practical integration patterns
- Recessed linear continuous runs are efficient for aesthetic continuity but require continuous sealing and expansion joints.
- Discrete downlights in soffits simplify replacement but need local reinforcement and clear thermal paths.
- Edge-lighting placed near gutters demands explicit roof drainage coordination to avoid ponding around luminaires.
Procurement and factory evidence: what to require from suppliers
Procurement should move beyond product labels and require documented evidence proving the integrated solution will perform as required.
Mandatory procurement evidence (decision-table 1 below gives a quick checklist)
- Project-specific shop drawings, complete with section details showing luminaire fit, seal details, fastener types and cable routing.
- Thermal compliance statement from luminaire/manufacturer confirming operating temperature in the enclosed profile or the need for remote drivers.
- Finish samples and fastener sample kits demonstrating finish and fastener compatibility per the finish schedule.
- Test certificates for luminaire ingress/impact ratings issued by recognized test houses (third-party where available).
- Factory inspection report and photographic evidence of sample unit build (or witness factory inspection).
- Electrical compliance statements and a proposed control strategy interface diagram from the luminaire supplier.
- Packing and transit protection description; integrated luminaires are often damaged in shipping unless protected.
Decision table 1 — Procurement evidence checklist (minimum)
| Evidence item | Purpose | Acceptable form |
|---|---|---|
| Project-specific shop drawings | Verify fit and interfaces | Scaled drawings with details and tolerances |
| Thermal compliance | Confirm operation in profile | Manufacturer letter/test data |
| IP/IK test certificates | Environmental protection confirmation | Third-party test report |
| Finish & fastener samples | Verify color and compatibility | Physical samples |
| Factory inspection report | Build quality and QA | Photographic report or certified FAI |
| Electrical compliance | Safety and EMC conformance | Manufacturer declaration / test report |
Shop drawing review
- The shop drawing review must be formalized—assign reviewers from architecture, structural, electrical and façade installation teams.
- The phrase shop drawing review is essential in the contract documents: require at least two iterations with sign-off stamps before tooling or extrusion orders are placed.
- Pay special attention to cable exit points, gland specification and any need for removable covers for maintenance.
Factory acceptance testing
- Define factory acceptance scope: visual and dimensional checks, sample sealing tests (water spray), and driver/LED run tests at elevated temperature if the luminaire will operate in enclosed cavities.
- Do not accept “off-the-shelf” luminaire certificates without project-specific verification that the installed condition matches test conditions.
Mid-article CTA If you are ready to formalise requirements for villa carport integrated lighting or want a project-specific procurement checklist, contact our technical sales team: /inquiry or email info@carportiva.com. For system options start with NordFlat architectural villa system or review all systems and our sourcing guides.
Site installation and operations
Installation readiness
- Before site works begin, confirm installation readiness by verifying the following:
- Approved shop drawings and production samples have been received.
- Structural anchors and foundations are complete and inspected relative to the carport loads.
- Electrical supply point and protection devices are confirmed and labelled.
- Site access is safe for lifting, temporary supports and protection of finished surfaces.
- On-site storage and handling procedures for integrated modules are documented.
- The exact phrase installation readiness should appear in pre-installation checklists and site handovers.
Installation sequence and best practice
- Install primary structure and check plumb/level before fitting integrated lighting runs.
- Run and terminate cabling in protected conduits within the carport structure—avoid field splices inside sealed luminaire cavities unless specifically designed for that purpose.
- Install luminaires as modules with their gasketed interfaces to roof panels; test seals with an on-site water test where possible.
- Commission lighting controls with daylight and occupancy sensors under representative conditions to avoid commissioning in atypical lighting.
Operation and maintenance
- Provide the owner with a maintenance pack: as-built drawings, component lists, spare parts recommendations, cleaning intervals and expected driver/lumen life.
- Define replacement procedures: whether luminaires are replaced from below, require module removal or need roof access.
- If solar PV is present on the same carport, coordinate operations to avoid cable congestion and to ensure that electrical isolation procedures are clear between the PV and lighting systems.
Implementation risk register and mitigations
Large integration projects introduce technical and contractual risks. Below is a compact register and mitigation measures.
High-level risk register (decision-table 2)
| Risk | Likely cause | Impact | Typical mitigation |
|---|---|---|---|
| Thermal failure of drivers/LEDs | Enclosed profile with insufficient ventilation | Reduced lifetime, warranty claims | Require thermal compliance, remote driver option, thermal break design |
| Water ingress / roof leaks | Poor sealing at luminaire interfaces or blocked drainage | Corrosion, electrical faults | Detailed seal detail in shop drawings; roof drainage coordination; on-site water test |
| Finish mismatch or fastener staining | Dissimilar metals or cheap finishes | Aesthetic failure and localized corrosion | Specify finish and fastener compatibility; require samples |
| Delayed delivery / lead-time mismatch | Late design sign-off, long extrusion lead times | Project delays and cost increases | Early procurement freeze; define lead times in contract |
| Installation access limitations | No maintenance access planned | Costly rooftop work for replacements | Design for below-deck serviceability or accessible removable modules |
| Interface dispute between trades | Unclear scope between structural, electrical and façade trades | Rework and claims | Early coordination meetings; clear scope in shop drawings |
Common mitigation actions
- Freeze critical interfaces (fixings, cable routes, drainage) early and record them in the shop drawings.
- Schedule a pre-installation coordination meeting that includes the electrical contractor, façade installer and luminaire supplier.
- Define Acceptance Criteria and Factory Acceptance Testing (FAT) requirements in the purchase order.
Six-step buyer workflow (named and prescriptive)
This is a practical workflow buyers can adopt to reduce procurement and delivery risk for villa carport integrated lighting.
- Define — "Illumination and Integration Brief"
- Prepare a single document describing the lighting intent, lux targets, controls strategy, finish schedule and maintenance assumptions.
- Design — "Coordinated Systems Design"
- Produce schematic drawings that combine structural members, aluminium profile sections, drainage routes and electrical routing. Include thermal assumptions for enclosed profiles.
- Specify — "Performance and Interface Specification"
- Issue an architectural carport specification that includes approved profile shapes, finish and fastener compatibility, luminaire performance envelopes and shop drawing expectations.
- Procure — "Evidence-Based Purchase Order"
- Place orders requiring project-specific shop drawings, factory evidence and FAT. Contractually bind lead times and scope of warranty.
- Review — "Shop Drawing Review & Factory Verification"
- Conduct the shop drawing review with all disciplines, ensure signatures and produce a non-conformance log for any changes. Arrange factory witness or sample checks.
- Install & Commission — "Site Installation, Test & Handover"
- Follow the installation readiness checklist; perform wet tests and electrical commissioning; provide the owner with the operation and maintenance pack.
Each step should produce a tangible deliverable (brief, coordinated drawings, specification, evidence pack, signed shop drawings, commissioning certificate) to demonstrate readiness to proceed to the next step.
Frequently asked questions (FAQ)
Q: Can I use standard off-the-shelf luminaires inside aluminium profiles? A: Not without verification. Off-the-shelf luminaires may rely on free air for cooling; when placed in an enclosed aluminium recess they may exceed rated temperatures. Require a thermal compliance statement and consider remote drivers or ventilated profiles.
Q: How do we avoid interfering with roof drainage? A: Include roof drainage coordination in the architectural carport specification. Avoid placing luminaire bodies where water naturally collects and provide continuous seals and drainage channels clear of luminaire cavities.
Q: Are powder coat finishes compatible with stainless steel fasteners? A: Finish and fastener compatibility must be specified. Use compatible metals and coatings to avoid galvanic corrosion; sometimes stainless steel fasteners with isolating washers are required. Request finish/fastener sample kits from suppliers.
Q: Who is responsible for luminaire electrical certification? A: The luminaire supplier should provide electrical compliance documentation; however, integration may change the installed environment, so the electrical designer and local authority must confirm conformity to local regulations. Site-specific electrical design requires local qualified professionals.
Q: What documentation should my procurement team require before production? A: At minimum, require project-specific shop drawings, thermal compliance statements, IP/IK test certificates, finish samples, factory inspection reports and a clear warranty statement tied to the documented project basis.
Q: Does Carportiva offer a system solution? A: Yes—consider the NordFlat architectural villa system as a system starting point. For full system choices review all systems and our sourcing guides. Contact /inquiry or info@carportiva.com for a project discussion.
Standards, evidence and third‑party references
- Structural design and load combinations should be calculated using recognised engineering standards—Eurocodes provide a harmonised approach for many European jurisdictions and useful reference material for load definitions and combination rules [1].
- Aluminium material selection, alloy performance and corrosion guidance should be referenced to reliable material guidance such as that issued by The Aluminum Association [2].
- Finish performance, accelerated weathering practice and evaluation of powder coatings should reference guidance from organisations such as the American Architectural Manufacturers Association where relevant to the project’s regulatory context [3].
- Where international product standards are required for particular components or test methods, consult applicable ISO standards and ensure certificates reference those standards [4].
Remember: do not rely solely on catalogue ratings—verify that the installed condition replicates the tested condition or obtain additional evidence.
Implementation checklist (pre-contract and pre-install)
Pre-contract
- Illumination brief approved and funding confirmed
- Approved profile family and finish schedule
- Electrical supply point allocated and preliminary protection specified
- Procurement evidence list included in purchase order
- Lead times defined and contingency allocated
Pre-install
- Shop drawings signed by all disciplines
- Factory samples and FAT completed
- Foundations and anchors inspected and cleared
- On-site storage and handling plan approved
- Installation readiness checklist signed and dated
Conclusion and next steps
Villa carport integrated lighting requires disciplined coordination across architectural, structural and electrical domains with procurement evidence driving a predictable delivery. Confirm the illumination intent, ensure aluminium profile selection matches thermal and fixation needs, resolve roof drainage coordination, and verify finish and fastener compatibility before manufacture. Require a robust shop drawing review protocol, insist on factory evidence and confirm installation readiness on site. For system-level options start with the NordFlat architectural villa system and review all systems and our sourcing guides for additional procurement templates.
Site-specific structural capacity, foundations, permits, electrical design, approvals, lead time, price, energy yield and warranty require a documented project basis and engagement with the relevant local qualified professionals, installers, utilities and authorities.
For project enquiries, technical specifications or to request procurement templates and shop drawing checklists, contact us: /inquiry or email info@carportiva.com.
References
- European Commission Eurocodes: https://eurocodes.jrc.ec.europa.eu/
- The Aluminum Association: https://www.aluminum.org/
- American Architectural Manufacturers Association: https://aamanet.org/
- ISO Online Browsing Platform: https://www.iso.org/obp/ui/
Keep the project brief connected.
Bring the actual project brief to the engineering table.
Share your location, layout, target application and available technical inputs. Carportiva can help identify the relevant product-interface information before a project-specific commercial discussion.
Request a project discussion