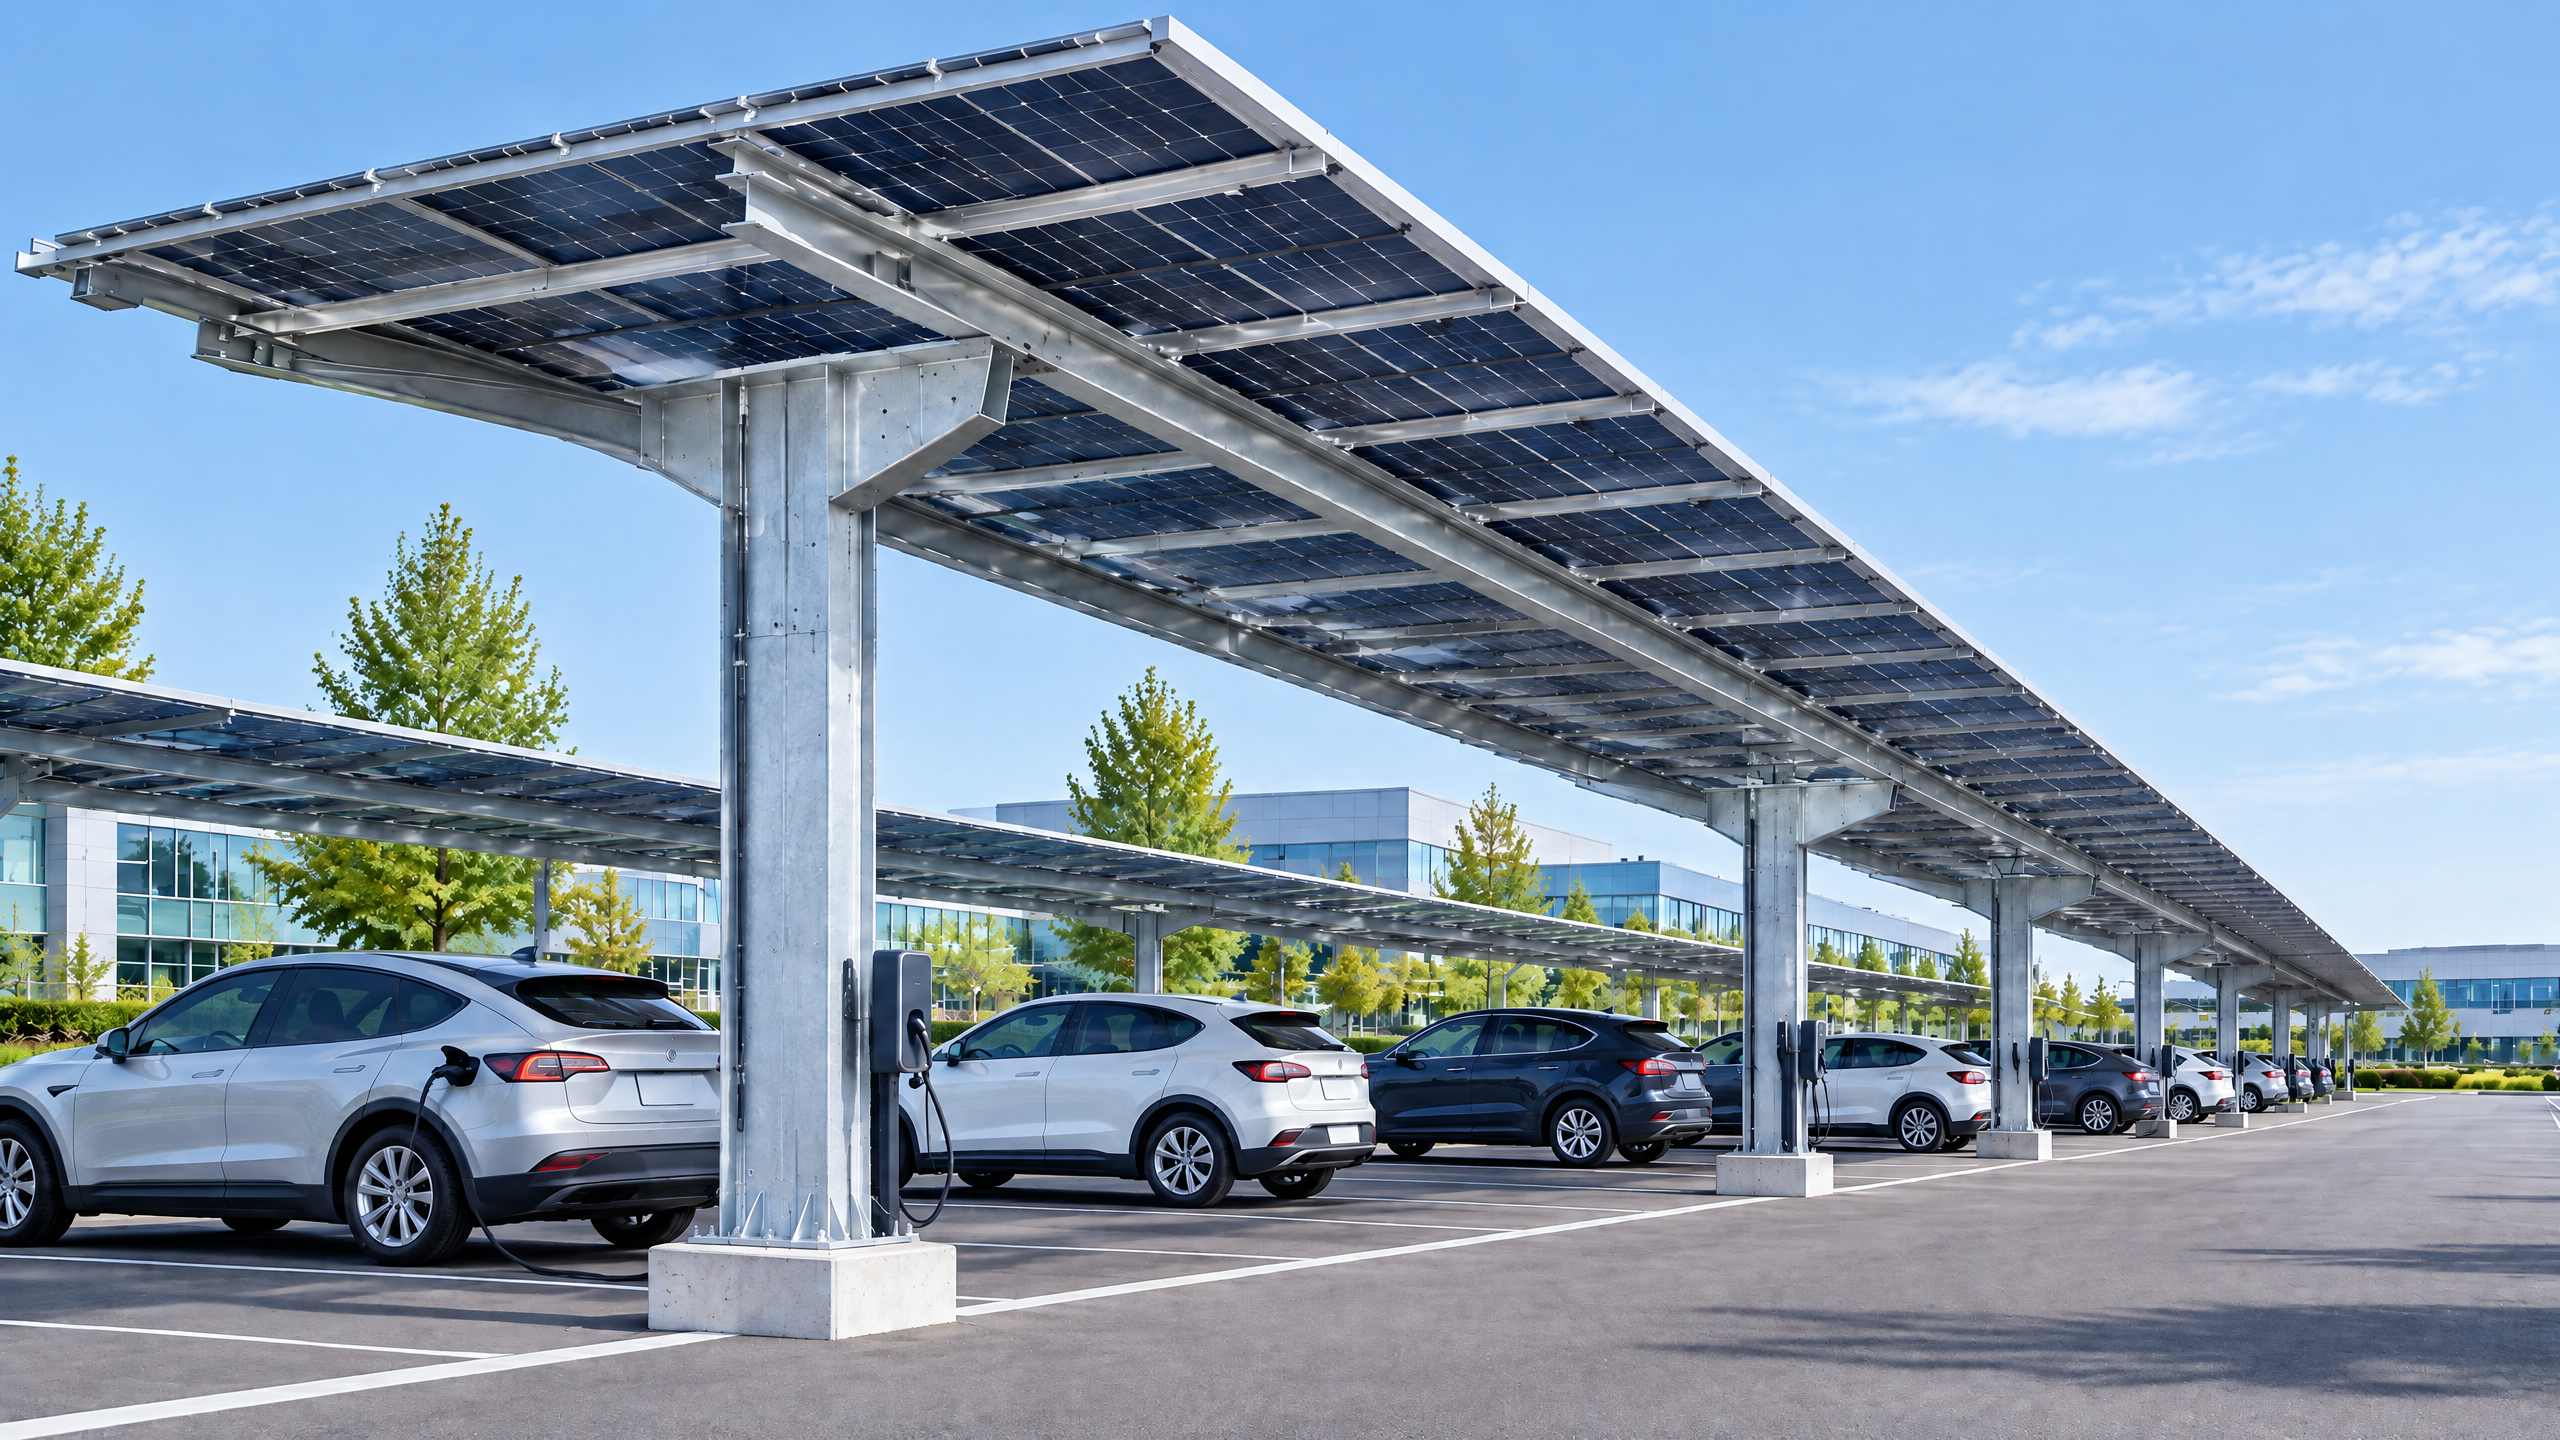
Direct answer (120–180 words) Locating grid connection equipment for a solar carport is a systems decision that balances electrical performance, structural integration, site operations and regulatory approvals. The optimum solar carport grid connection equipment location minimizes AC cable runs, preserves vehicle and maintenance access, aligns with the solar carport structural interface, and fits utility interconnection and permit requirements. Early coordination between the PV designer, structural engineer, electrical contractor, utility and project procurement reduces rework, lead-time and total installed cost. Use site-specific solar resource and production models (e.g., PVWatts) to size inverters and switchgear, and confirm interconnection capacity and procedures with the local utility or authority. Throughout procurement and factory documentation, demand clear acceptance criteria for electrical pathway planning, maintenance access planning and PV equipment coordination. Note: site-specific structural capacity, foundations, permits, electrical design, approvals, lead time, price, energy yield and warranty require a documented project basis and relevant local qualified professionals, installers, utilities and authorities.
Buyer context and scope boundary
Purpose and intended readers This guide is written for distributors, architects, contractors, developers, solar EPCs and fleet operators who must make procurement and design decisions about where to place grid connection equipment for commercial solar carports. It assumes a B2B procurement context: formal RFIs/RFPs, technical tenders, factory acceptance evidence and integration with other site disciplines.
What “grid connection equipment location” covers
- AC disconnects, inverters, transformers, switchgear, meter sockets/panels, utility point of connection (POC), protection relays and junction boxes.
- Conduits, cable trays and buried ducts that form the electrical pathway between PV arrays and the utility point of interconnection.
- Structural interfaces where electrical equipment mounts to or passes through carport columns, beams and foundations.
What this guide does not cover in detail
- In-depth inverter control programming, advanced protection schemes or site-specific relay settings — these are engineering deliverables.
- Local permit form filling, site survey paperwork or specific local utility tariffs — consult local authorities and utility documents.
Scope boundary example statements
- This guide addresses layout, procurement and implementation implications for grid connection equipment location at commercial solar carports. It is not a substitute for project-specific engineering or permit submissions.
Core decision principle
A single guiding principle Place grid connection equipment where it minimizes lifecycle cost and risk while meeting operability, safety and regulatory requirements. Lifecycle cost includes installation labor, civil works (foundations/trenching), cable losses and maintainability.
Key drivers that define “minimizes lifecycle cost and risk”
- Electrical pathway planning: reduce AC run lengths to lower material, labor and thermal losses.
- Solar carport structural interface: use structural capacity and routing to avoid retrofits or additional foundations.
- Utility and permit interface: align the POC location with utility preferences to avoid costly relocations or network upgrades.
- Maintenance access planning: ensure safe, code-compliant access and ventilation for inverters/transformers and room for future replacement.
- PV equipment coordination: synchronize procurement windows and mounting interface details between shelter/carport and PV/BOS vendors.
Decision trade-offs explained
- Centralized equipment rooms (close to grid POC) reduce trench length but may require reinforced foundations and more complex structural penetrations.
- Distributed inverter locations nearer to arrays shorten DC cable runs but create multiple maintenance points and possibly more AC distribution complexity.
- Above-ground vs buried pathways: above-ground trays are cheaper to install and inspect but may conflict with vehicle clearance and aesthetics.
Planning inputs — what information you must gather early
Collect these inputs before tendering equipment locations. Missing items cause design rework and procurement delays.
Site survey and civil inputs
- Topography, existing utilities, geotechnical report and planned vehicle circulation.
- Column grid and spacing for carports; foundation types and constraints.
Electrical system and grid inputs
- Desired AC POC, required generation capacity, interconnection study results (if any), utility metering and relay requirements.
- Local grid code and any anti-islanding or export limits — confirm with utility early (see interconnection resources) [4].
Performance and yield inputs
- Solar irradiance and shading analysis, tilt and azimuth for canopies. Use PVWatts or equivalent to model expected yield for sizing inverters and energy harvest expectations [2][1].
Operational and maintenance inputs
- Maintenance regimes, required access clearances, vehicle clearance for carport bays and anticipated future operations (EV chargers, battery storage).
Procurement and logistics inputs
- Site access for deliveries, crane restrictions, staging areas and local lead times for long-lead items like transformers and custom switchgear.
Stakeholders to involve early
- Structural engineer, PV system designer, utility representative, electrical contractor, civil contractor, procurement manager and operations representative.
Planning checklist (decision table)
| Input category | Why it matters | Who must confirm |
|---|---|---|
| Utility capacity and POC | Determines transformer/inverter sizing and location near the grid | Utility + electrical designer |
| Carport structural grid | Defines where equipment can physically mount or be routed | Structural engineer + architect |
| Geotechnical & foundations | Determines trench/backfill feasibility and foundation loads | Geotech + civil engineer |
| Maintenance & vehicle access | Ensures safe access and avoids conflicts with operational use | Operations + maintenance lead |
| Local permit & code | Influences enclosure types, clearances and wiring methods | Permitting authority + electrical engineer |
| Site logistics | Affects sequencing and installation strategy | General contractor + procurement |
Technical specification and interfaces
Define which equipment locations are technically feasible and specify clear interface requirements between disciplines.
Equipment location typologies
- Adjacent centralized room or kiosk: Equipment clustered near site POC. Pros: single maintenance zone, simpler utility coordination. Cons: civil works for foundation and enclosure, potential ventilation needs.
- Column-mounted enclosures: Small inverters or combiner boxes mounted on carport columns. Pros: shorter DC/AC runs, minimal footprint. Cons: structural capacity impacts; limited capacity per enclosure.
- Distributed inverter clusters: Inverters near string groups under the canopy. Pros: reduced DC cable losses; modular replacement. Cons: more points of failure, increased maintenance planning.
- Off-site or building-mounted: Use an existing building for equipment to reduce civil work at carport. Pros: simpler foundations. Cons: longer routing and potential thermal/ventilation constraints.
Structural interface requirements
- Define a solar carport structural interface condition in specifications: include mounting brackets, cut-outs, penetrations, fixings, and load cases for equipment and cable trays.
- Require structural engineer sign-off on any through-column or through-beam penetrations and note corrosion protection for aluminum and steel connection points.
Electrical pathway planning
- Specify conduit and cable tray runs with capacity and derating factors, separation between DC and AC runs, and minimum bend radii and fill percentages.
- Define access points and junction boxes; require as-built drawings showing all raceways and pull points.
Environmental and safety interfaces
- For transformers and inverters, specify ventilation, temperature ranges, IP ratings and fire separation distances per local codes.
- Define lockout/tagout points and emergency shutdown locations compatible with utility and site emergency plans.
Interconnection and metering
- Determine proposed metering point and whether the utility requires CT metering, revenue meters or secondary metering in a specific enclosure; include requirements in the procurement documents.
- Reference interconnection resources and local rules; where relevant engage the utility early (see FERC interconnection resources) [4].
Decision table: location typology vs procurement priorities
| Priority | Centralized room/kiosk | Column-mounted enclosures | Distributed inverters |
|---|---|---|---|
| Minimize AC cable length | Medium | High | High |
| Minimize DC cable cost | Medium | High | High |
| Structural impact | High (foundation needed) | Medium (column loads) | Medium |
| Maintenance access | High (central) | Low (many locations) | Medium |
| Permitting complexity | High (enclosure/ventilation) | Medium | Medium |
| Scalability | Medium | Low | High |
Procurement and factory evidence
What to require from suppliers during procurement to ensure location decisions are validated
Contract documents and RFQ/RFP requirements
- Require vendor responses to include equipment weights, mounting dimensions, anchorage details, cable entry locations and recommended clearances.
- Insist on factory acceptance test (FAT) documentation for inverters, switchgear and transformers with witness options where necessary.
- Demand BIM/CAD models and point-cloud-ready drawings for clash detection with carport structures and conduit routes.
Factory evidence and acceptance criteria
- FAT and type test reports where applicable (do not accept unverified claims). Ask vendors to reference recognized standards that apply locally.
- Shop drawings showing exact mounting points and recommended foundation loads for each equipment item.
- Cable schedule and terminal identification that match the electrical one-line and structural penetrations.
Logistics and lead times
- Document lead times explicitly in the contract; long-lead items include pad-mounted transformers, custom switchgear and certain meter enclosures.
- Include responsibility for coordination of equipment deliveries and storage to prevent damage to PV modules and carport elements.
Quality assurance checklist (decision table)
| Evidence item | Purpose | Accept / Reject criteria |
|---|---|---|
| Shop drawings (full-scale) | Confirm dimensional interface | Accept if stamped and matches structural grid |
| FAT reports | Verify functional performance | Accept if tests align with spec and traceable to product serials |
| BIM models | Clash detection | Accept if calibrated to site survey within acceptable tolerance |
| Packing and handling docs | Reduce damage risk | Accept if includes weight, lifting points, packaging specs |
| Warranty and service terms | Post-install protection | Accept if clearly stated, with exclusions listed |
Linking procurement to Carportiva products and guides
- If specifying carport structure, reference SolarGrid commercial solar system for structural options and to ensure compatibility with PV equipment. Review all systems for comparative system options and consult sourcing guides for supplier selection best-practices.
Note on site-specific engineering
- site-specific structural capacity, foundations, permits, electrical design, approvals, lead time, price, energy yield and warranty require a documented project basis and relevant local qualified professionals, installers, utilities and authorities.
Site installation and operations
Installation sequencing and considerations to maintain the chosen equipment location
Installation sequencing
- Site mobilization and temporary protection of carport areas.
- Foundations and trenching for conduits; coordinate with structural column works.
- Erection of carport structure and installation of module mounting systems.
- Placement and securing of cable trays, conduit, and routing to equipment locations per drawings.
- Installation of electrical equipment (inverters, transformers, switchgear) and interconnection to utility POC.
- Testing, commissioning and handover documentation.
Best practices during installation
- Use staged delivery for heavy equipment; align arrival with crane and foundation readiness.
- Protect cable ends and maintain conductor cleanliness; ambient dust and moisture during construction can impact electronic equipment.
- For column-mounted equipment, use torque-specified fasteners and corrosion barriers between dissimilar metals (anodized aluminium vs steel fixings).
- Keep a verified as-built conduit and tray map with depth and location for future trenching or EV charger additions.
Operations, maintenance and replacement planning
- Define maintenance access planning in O&M (operations and maintenance) manuals: clearances, bypass procedures, spare parts list and equipment replacement footprints.
- Plan for safe inverter replacement: ensure removable access panels, lifting points and adequate clearance for crane or mobile lifting devices.
- Coordinate operations with parking/asset managers to avoid blocked access during scheduled maintenance windows.
Site documentation handover
- Provide full commissioning report, updated as-built BIM, sequence of operations, single-line diagrams, and warranties.
- Make sure meter configuration and export limits are documented with the utility’s sign-off.
Implementation risk and mitigations
Common implementation risks related to equipment location and how to mitigate them
Risk: Utility POC shifts or utility requests for relocation
- Mitigation: Early utility engagement; include a contingency in the electrical pathway planning and procurement schedule. Obtain written confirmation of POC location.
Risk: Structural incompatibility (insufficient column capacity)
- Mitigation: Require structural interface drawings in vendor proposals and pre-order structural calculations. If column-mounting is required, provide reinforcement design options.
Risk: Inadequate ventilation or heat accumulation
- Mitigation: Specify equipment with appropriate IP ratings and thermal derating allowances for the site ambient. For enclosed kiosks, require ventilation calculations and temperature monitoring.
Risk: Conflicting routing with other site services (drainage, telecoms, gas)
- Mitigation: Conduct comprehensive site utility scans and coordinate via BIM clash detection prior to trenching or concrete pours.
Risk: Excessive AC or DC cable runs increasing losses
- Mitigation: Use electrical pathway planning to optimize inverter placement; consider increasing inverter count or moving AC collection points.
Risk: Long lead times for equipment delaying construction
- Mitigation: Integrate long-lead items into procurement early, reserve production slots, and require supplier lead-time guarantees in purchase orders.
Risk: Maintenance access blocked by future site changes
- Mitigation: Define maintenance corridors and include them in site management plans and lease agreements where applicable.
Regulatory and contractual risk points
- Ensure contracts define who is responsible for permit applications, meter installations and utility inspections. If a third party will own the asset (e.g., PPA provider), align responsibilities in the O&M and lease agreements.
A six-step buyer workflow (named: CLEARLOCATE workflow)
A simple, named six-step workflow buyers can apply to structure procurement and decisions about solar carport grid connection equipment location.
C — Confirm site, utility and operational constraints
- Collect site survey, geotechnical, utility POC and operations requirements.
L — Layout candidate locations and model impacts
- Produce layout options with electrical pathway planning and energy yield modeling (use PVWatts for yield scenarios) [2][1].
E — Engage stakeholders and validate structural interface
- Obtain structural sign-off on penetrations and mounting points; define solar carport structural interface requirements.
A — Assemble procurement package and evidence checklist
- Request shop drawings, FAT reports, BIM models and lead times; use the procurement decision tables above.
R — Review risks and finalize location with contingency plans
- Execute interconnection applications and secure written utility POC confirmation; include contingency budgets.
L — Launch installation and verify as-built documentation
- Sequence works, witness critical tests, and ensure updated as-built BIM and commissioning report.
Ongoing: Operate and maintain with documented access plans and spare parts lists
- Integrate maintenance access planning into operations schedules and asset management.
Workflow decision points and acceptance gates
- Gate 1 (after C & L): Utility confirmation and site survey complete.
- Gate 2 (after E & A): Structural sign-off and procurement evidence accepted.
- Gate 3 (after R & L): Finalized installation plan and commissioning checklist approved.
Related B2B sourcing terms
For the same project brief, buyers may also encounter these connected search terms: commercial solar procurement. They must be interpreted against the actual project scope rather than treated as independent technical guarantees.
Frequently asked questions (FAQ)
Q: Should equipment be mounted on carport columns or in a separate kiosk? A: There is no single answer — choose based on electrical pathway planning, structural capacity, maintenance access planning and utility requirements. Column-mounted equipment reduces conductor run lengths but may require structural reinforcement; kiosks centralize maintenance but incur civil costs for foundations and ventilation.
Q: How do cable losses influence equipment location? A: Longer AC or DC runs raise losses and can reduce yield. Model losses during the planning stage using site data and include derating factors for temperature and conduit fill. PVWatts and similar tools can help quantify yield impacts but use detailed DC/AC electrical modeling for precise loss analysis [2][1].
Q: When should I involve the utility? A: Engage the utility as early as possible—before finalizing the POC and equipment location. Utilities may have preferred metering positions, relay settings or transformer requirements. Early engagement reduces the risk of rework or unexpected interconnection costs [4].
Q: What documentation should I require from the PV and carport suppliers? A: Shop drawings, structural attachment details, BIM models, FAT records, cable schedules and warranty terms. Require a documented solar carport structural interface that spells out fixings, load cases and penetrations.
Q: Can I locate equipment under the carport canopy? A: Yes, small inverters and combiner boxes are often mounted under canopies, but ensure weatherproofing, ventilation and maintenance access. Confirm local codes for clearances and enclosure ratings.
Q: What about EV chargers and additional load? A: Plan for future loads by reserving conduit pathways and considering spare capacity in switchgear. Coordinate PV equipment coordination and electrical pathway planning to include expected EV infrastructure.
Q: Are there standard industry references for interconnection? A: Yes — consult national/regional interconnection guides and resources. For high-level U.S. interconnection resources, see FERC for generator interconnection materials; confirm local rules and timelines with the local utility and authority [4].
Conclusion
Locating grid connection equipment for solar carports is a cross-disciplinary procurement and design decision that affects capital cost, installation complexity, operational access and energy yield. Apply the CLEARLOCATE workflow to structure decisions: confirm site and utility constraints, model impacts, validate structural interfaces, assemble procurement evidence, review risks and finalize installation. Demand detailed shop drawings, FAT documentation and BIM models from suppliers and engage local utilities and authorities early. For supplier-specific integration, review SolarGrid commercial solar system and compare options on all systems. For procurement templates and checklists, see sourcing guides.
Remember: site-specific structural capacity, foundations, permits, electrical design, approvals, lead time, price, energy yield and warranty require a documented project basis and relevant local qualified professionals, installers, utilities and authorities.
Mid-article support and enquiries If you would like project-specific advice or to discuss integration with our structural carport systems, contact our team: /inquiry or info@carportiva.com.
Final checklist for next steps
- Secure utility confirmation of POC and interconnection requirements.
- Commission structural interface drawings and confirm foundation loads.
- Add procurement clauses requiring FAT, BIM and shop drawing sign-off.
- Reserve lead times for long-lead items and coordinate delivery windows.
- Embed maintenance access planning into site operations and lease agreements.
Closing CTA For tailored procurement support and to explore compatible systems, contact us at /inquiry or info@carportiva.com.
References
- NREL PV resources and research for general solar planning [1].
- PVWatts solar production estimator for preliminary yield scenarios [2].
- U.S. Department of Energy Alternative Fuels Data Center for EV charging considerations and integration basics [3].
- FERC interconnection resources for generator interconnection guidance and policy context [4].
References
- National Laboratory of the Rockies PV resources: https://www.nrel.gov/solar/
- PVWatts Calculator: https://pvwatts.nrel.gov/
- U.S. Department of Energy Alternative Fuels Data Center: https://afdc.energy.gov/
- Federal Energy Regulatory Commission interconnection resources: https://www.ferc.gov/electric-transmission/generator-interconnection
Keep the project brief connected.
Bring the actual project brief to the engineering table.
Share your location, layout, target application and available technical inputs. Carportiva can help identify the relevant product-interface information before a project-specific commercial discussion.
Request a project discussion