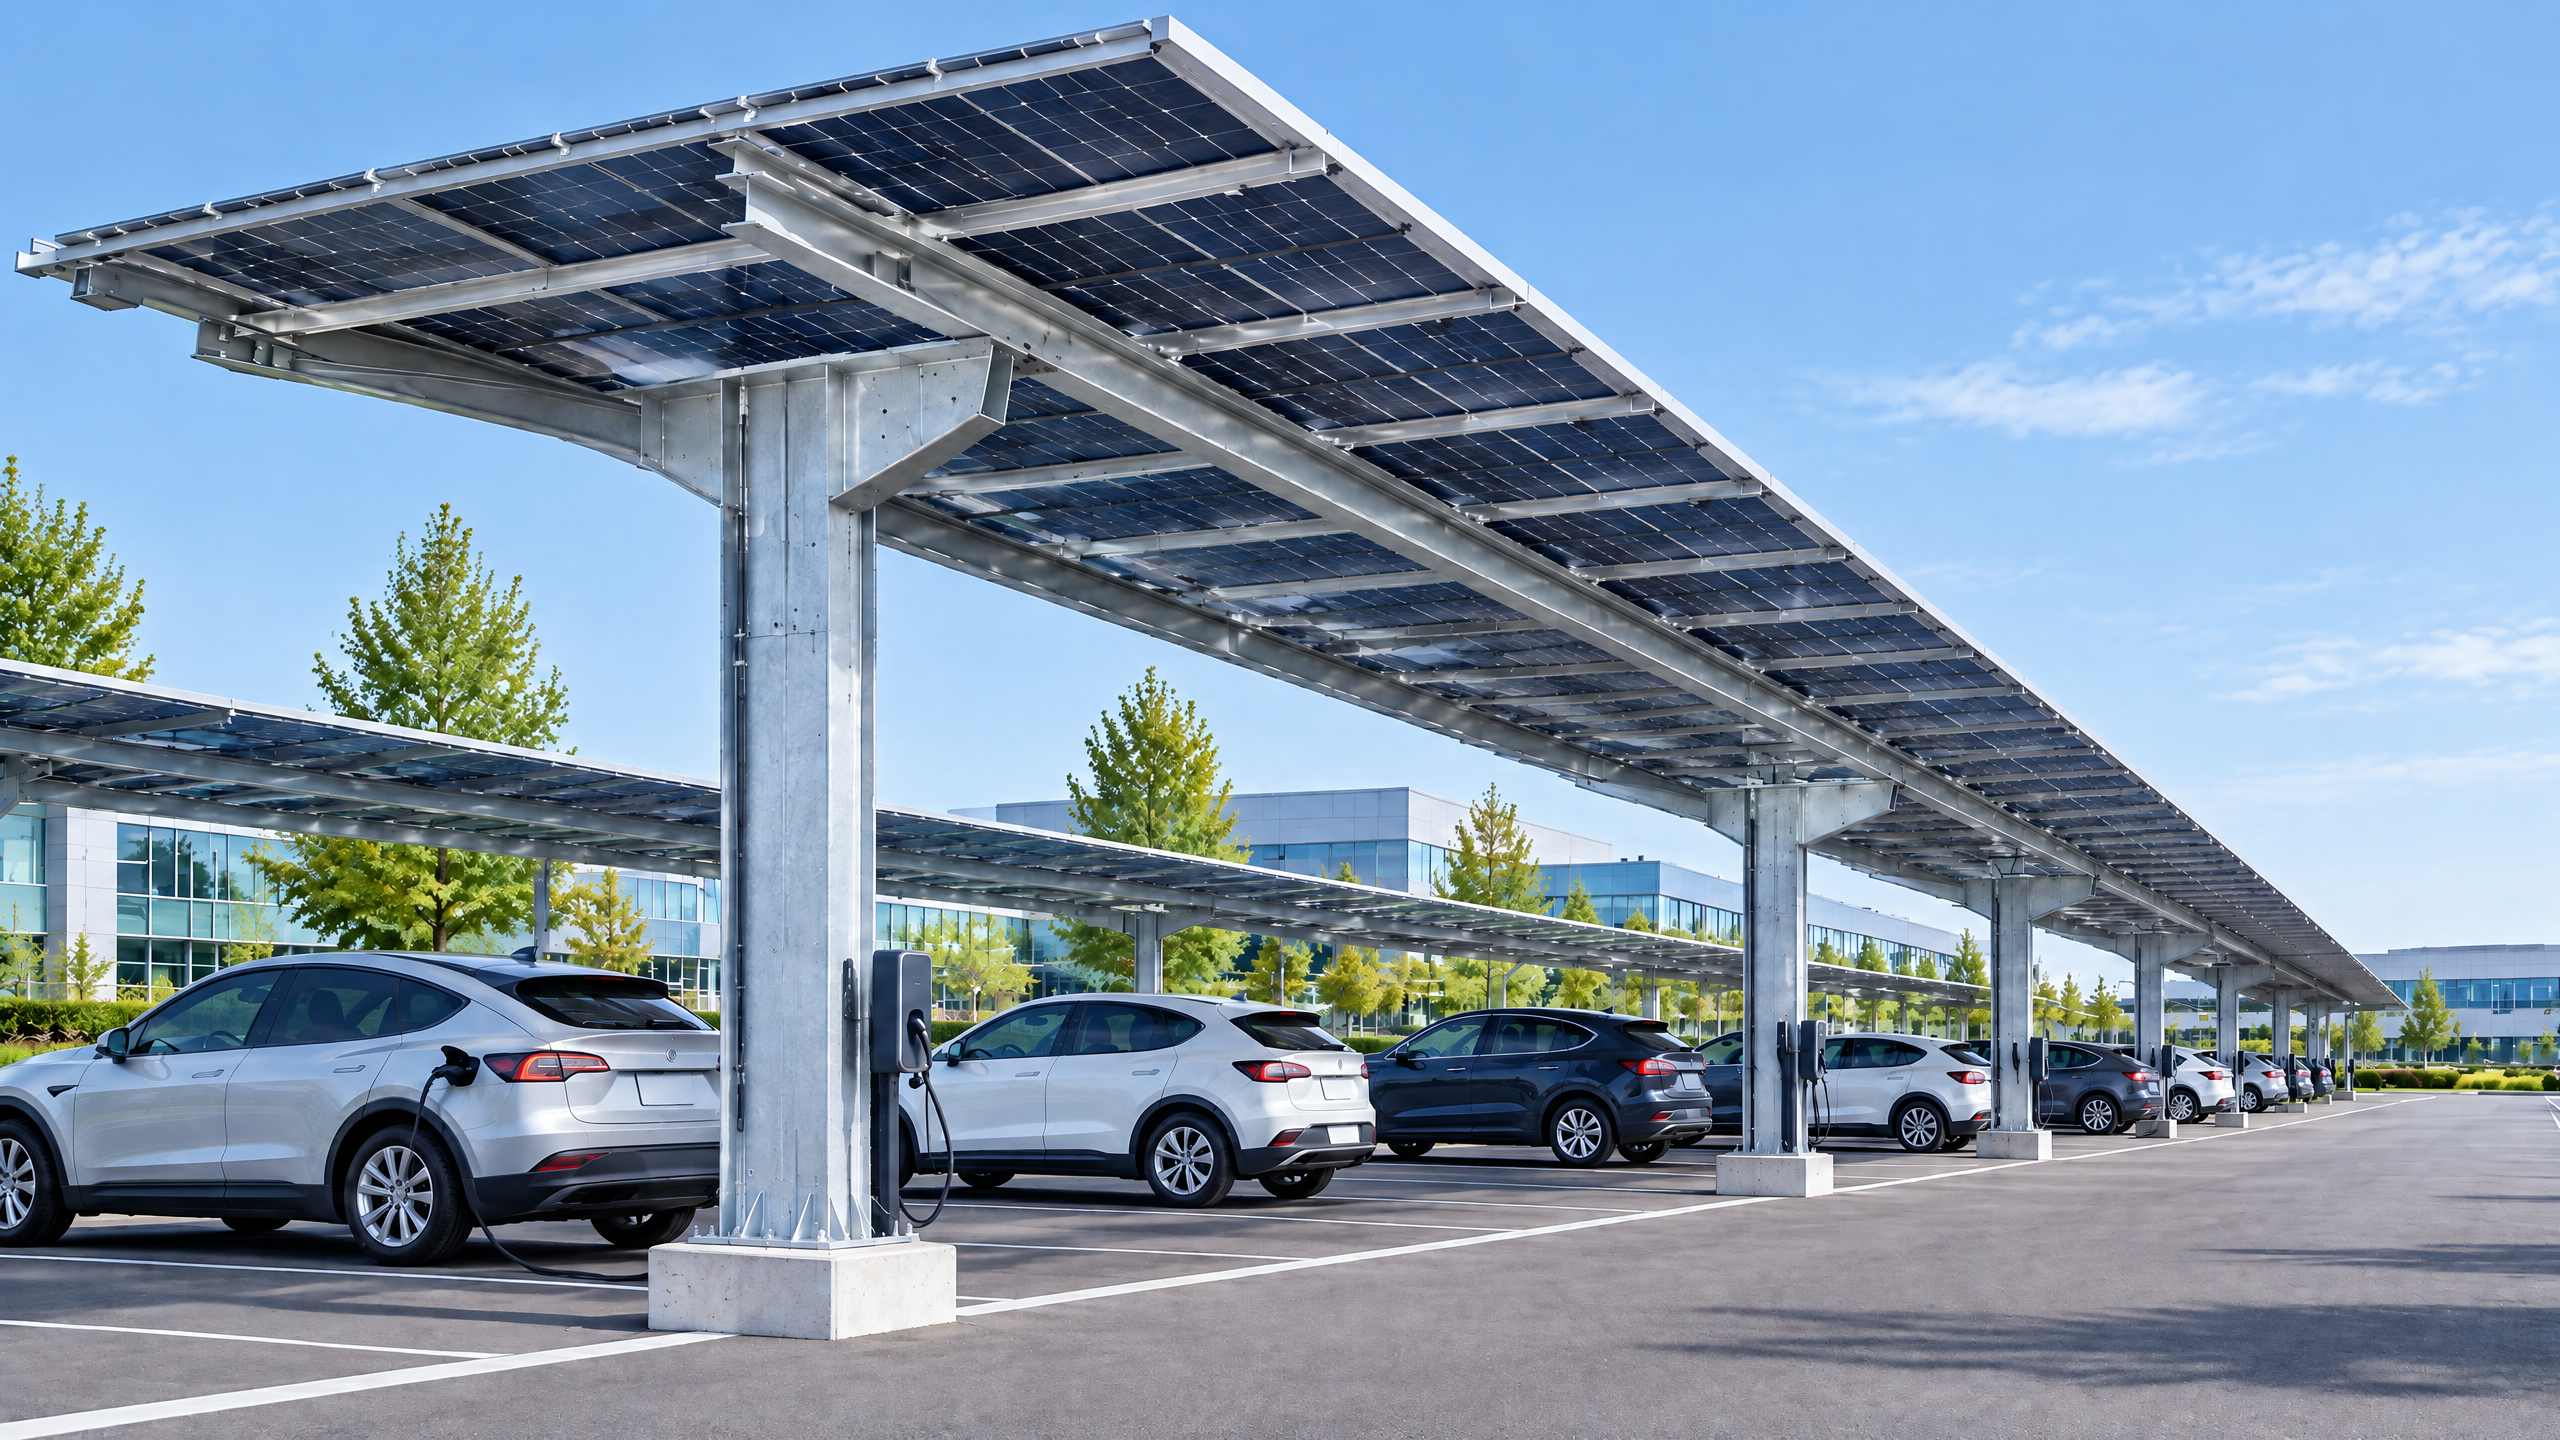
Direct answer (120–180 words) The commercial solar canopy pv interface is the single project boundary where structural, electrical and operational systems meet; B2B buyers must evaluate it as an integrated engineering and procurement problem rather than as separate product purchases. A robust evaluation focuses on four outcomes: verified structural capacity for modules and loads, clear electrical pathway planning and interconnection, coordinated PV equipment and civil works procurement and documented handover with maintenance access planning. Evaluate contractual responsibility (who owns which interface), evidence from factory and site tests, and how utility and permit interface will be managed. Use energy-yield modelling and jurisdictional interconnection rules as tolerance checks for the commercial case, and require a documented project basis with local qualified professionals to confirm foundations, permits, cable routes, commissioning and warranty activation. Treat interface decisions as lifecycle trade-offs: availability, safety, maintainability, energy yield and total installed cost.
Buyer context and scope boundary
What this guide covers
- Primary topic: commercial solar canopy pv interface — the mechanical, structural and electrical connection zone between an architectural aluminium carport or canopy and the photovoltaic (PV) system mounted on it.
- Target readers: distributors, architects, contractors, developers, solar EPCs and fleet operators evaluating procurement and implementation for commercial solar carports, fleet shelters and industrial PV canopy projects.
- Scope boundary: this guide focuses on design, procurement and project delivery implications of the interface itself. It does not replace jurisdictional structural design, electrical engineering, or utility interconnection studies. Site-specific structural capacity, foundations, permits, electrical design, approvals, lead time, price, energy yield and warranty require a documented project basis and relevant local qualified professionals, installers, utilities and authorities.
What the interface does (brief)
- Transfers PV module and rack loads into structural members.
- Defines routing and protection for DC and AC cabling, meter points and earthing.
- Establishes access, working clearances and service routing for long-term operations (maintenance access planning).
- Anchors contractual boundaries between canopy supplier, PV equipment suppliers and the EPC contractor.
Why this matters for B2B buyers
- Misaligned interfaces increase schedule risk and lifecycle cost.
- Clear interface scope improves procurement clarity, reduces variation orders and accelerates commissioning.
- For fleet operators and developers, the canopy-PV interface affects both asset uptime and safety compliance.
Core decision principle
One guiding principle Evaluate the commercial solar canopy pv interface by prioritising lifecycle performance and clearly allocating responsibility. The primary decision criterion is: which interface allocation minimizes project-level risk to safety, energy yield and operations while delivering a predictable total installed cost within the required timetable?
Decision metrics to use
- Structural safety and code compliance (wind/snow/uplift) — verified by structural calculations.
- Energy yield and availability — modelled with accepted tools and checked for shading/tilt compromises [1][2].
- Maintainability — measured by ease and safety of access, and by spare parts strategy.
- Interconnection feasibility — measured by utility acceptance timelines and interconnection points [4].
- Schedule and lead time certainty — validated by vendor production capacity and logistics planning.
- Clear warranty and acceptance tests — factory and site-based.
How to weigh trade-offs
- Prioritise safety and compliance first.
- Where energy yield conflicts with structural or architectural constraints, quantify revenue impact (use PVWatts or equivalent) and make a commercial trade-off.
- Allocate residual risk to the party best able to control it via contract.
Planning inputs: what a buyer must collect before evaluating vendors
Minimum plan and site data checklist
- Geotechnical report and foundation constraints.
- Topographic survey and exact finished grade elevations.
- Structural load table: allowable bearing, uplift and lateral constraints, and any nearby retaining or buried structure.
- As-built electrical single-line diagrams and point-of-connection details, or a planned utility service diagram.
- Obstacle and shading survey with solar access analysis (sunpath, nearby structures, trees).
- Local wind and snow design criteria and applicable codes.
- Expected vehicle operations, clearance, and EV charging locations.
- Planned module and inverter families (or performance targets).
- Stakeholder RACI (owner, canopy supplier, EPC, utility, local authority).
Decision table: Required documents and responsible party
| Document / Input | Typical responsible party to produce | Why it matters |
|---|---|---|
| Geotechnical report | Owner / Developer (contracted geotechnical engineer) | Determines foundation type, allowable loads and fixation methods |
| Topographic/site survey | Owner or civil surveyor | Locates foundations and utilities, essential for cable routing |
| Structural code criteria (wind/snow) | Local structural engineer / consultant | Specifies design loads for canopy and module attachment |
| Utility point of interconnection and service details | Owner / utility | Defines metering, transformer and AC routing needs |
| Shading and solar access study | PV designer / energy modeller | Quantifies energy yield impact and optimises layout [1][2] |
| Traffic and vehicle operations plan | Owner / fleet manager | Sets clearance, bay layout and maintenance access planning |
Why completeness matters Incomplete inputs produce ambiguous interfaces, leading to RFIs, change orders and schedule slippage. Require vendors to price against the same dataset; if a vendor asks for assumptions, document them and assign the risk in contract.
Technical specification and interfaces
Break the interface into sub-domains and key acceptance points:
- Solar carport structural interface
- PV equipment coordination
- Electrical pathway planning
- Utility and permit interface
- Maintenance access planning
Solar carport structural interface
- Design loads: ensure the canopy structure has been specified for dead load of PV modules, live loads, wind uplift and any concentrated loads from maintenance equipment. Structural calculations must show connections and capacity for panel clamps, rails and rail attachments.
- Attachment detailing: specify whether modules are top-clamped or framed, clamp type, torque values, and corrosion class (for fasteners and coatings). Include interface plate drawings and weld details for bespoke brackets.
- Tolerances and alignment: flatness and planarity tolerances for module rails and standoff heights to avoid undue stress on modules or modules’ backsheet.
- Drainage and waterproofing: canopy designs often integrate electrical equipment; ensure cable entry points and combiner boxes do not create water ingress paths.
PV equipment coordination
- Module layout: define stringing zones, string lengths, and where combiners and module-level power electronics (MLPE) will mount.
- Inverter/combiner siting: locate inverters and combiner boxes in weather-protected zones with ventilation, access and security; design for wiring distance limits and voltage drop.
- Racking compatibility: confirm racking interface with the canopy profile; use vendor-supplied anchor detail sheets and load tables to match to structural members.
- PV equipment coordination must be captured in the procurement package so that the canopy supplier and PV supplier design for each other, not as afterthoughts.
Electrical pathway planning
- DC routing: define continuous conduit pathways from module combiner locations to inverter locations, including bends, conduit fill and junction points.
- Conductor sizing and protection: establish DC cable sizing with temperature correction and permissible voltage drop; define overcurrent protection and disconnect locations per local electrical code.
- AC routing: plan conduit, meter and transformer locations, and routing to the point of interconnection. Coordinate with utility for revenue metering and anti-islanding requirements.
- Earthing and bonding: design canopy earthing in accordance with local code; include bonding for module frames, racks and structural members. Consider equipotential bonding where EV chargers and other metallic structures are present.
- Cable access and segregation: allocate separation between DC and AC runs to reduce EMI and facilitate maintenance.
Utility and permit interface
- Early engagement: involve the utility early for interconnection requirements, metering location, relay requirements, and protective-device settings; this reduces rework and avoids late design changes [4].
- Permit bundles: compile a permitting package that includes structural calculations, single-line electrical diagrams, one-line inverter documentation and site plans showing canopy locations.
- Revenue metering and telemetry: specify metering accuracy class, SCADA or telemetry requirements, and whether export limits or curtailment functionality will be required by the utility.
Maintenance access planning
- Access corridors: ensure safe access for technicians to string combiner locations, inverters and module surfaces. Establish clearance for lifts or scaffolding if modules are mounted at non-standard heights.
- Replacement procedure: design for simple removal and replacement of modules and inverters; document required tools and availability of spare modules.
- Serviceability of finishes: specify powder-coating classes, expected touch-up procedures and replacement parts availability.
Decision table: Interface acceptance criteria and tests
| Interface area | Acceptance criteria | Typical verification/test |
|---|---|---|
| Structural attachment | Structural calculations signed by a licensed engineer; anchor pull-out capacity meets safety factor | Review of calculation pack; pull-out test or proof load test where required |
| Panel alignment | Planarity within specified tolerance; no point loads on modules | Laser-level survey; visual and torque checks on clamps |
| DC cable pathway | Continuous conduit with bend radii and fill within code; labels applied | Physical inspection; continuity and insulation resistance test |
| Earthing | Continuity resistance within spec; equipotential bonding complete | Soil resistivity test (if required); earth loop resistance test |
| Utility metering | Meter installed in agreed location; telemetry verified | Witness meter installation and functional test with utility |
| Maintenance access | Clearance matches requirement, access ladders/points installed | Walk-down against maintenance access checklist |
Technical standards and modelling
- Use regionally accepted structural codes and electrical standards. For energy yield estimation use recognised tools like PVWatts or equivalent; PVWatts is a useful check when producing preliminary yield estimates [2]. NREL’s solar resources and modelling toolsets provide authoritative irradiance and resource guidance [1].
Procurement and factory evidence
What to request from canopy and PV suppliers
- Structural calculations, drawings and BOM (bill of materials).
- Material certificates for structural steel/aluminium and coating specifications.
- Factory inspection and test reports for fabricated structures.
- Module and inverter datasheets, performance curves, and environmental ratings.
- FAT (factory acceptance test) protocol and witness schedule.
- Lead times for long-lead items (modules, inverters, transformers, bespoke fabricated brackets).
- Packing and shipping drawings, including shoring, dunnage, and lifting points.
Factory evidence and acceptance
- FAT scope: visual checks, dimensional verification, coating checks, mechanical fit checks and full mechanical function tests for moving parts. For canopy frames, FAT evidence should include dimensional gauging of primary members and splice fits.
- Traceability: request batch and heat numbers for critical components, and manufacturer certificates of conformity.
- Photos and measurement logs: insist on photo documentation of assemblies and quality checks before shipment.
- Third-party inspection: for high-value or high-risk projects, include a third-party quality assurance inspection before dispatch.
Contract clauses and allocation of interface responsibility
- Interface responsibility matrix: include a RACI that lists canopy supplier responsibilities (e.g., supply of brackets, tolerance compliance), PV supplier responsibilities (modules, MLPE, AC combiner), and EPC responsibilities (site assembly, cable pulls, earthing).
- Milestone-linked payments: tie payments to delivery batches, FAT sign-off, site delivery and commissioning.
- Variations and unknown site conditions: include a defined process and uplift rates for unforeseen conditions (rocky substrates, contaminated soils, late utility changes).
- Warranty activation: define how warranties are linked to commissioning certificates and written acceptance. Include a process for pre-commissioning checks that will unlock manufacturer warranties.
Procurement checklist: what to include in the technical package
- Site baseline (survey, geotech, utility info).
- Architectural canopy drawings and module layout.
- Structural detail drawings with anchor plate and foundation details.
- Electrical single-line and cable routing drawings.
- Commissioning tests and witness schedule.
- O&M manual requirements and spare parts list.
Links and resources
- When considering integrated products, review supplier systems such as the SolarGrid commercial solar system for examples of a combined canopy-PV product offering. For broader comparison, see all systems and consult sourcing guides to ensure you evaluate both canopy supply and PV equipment together.
Mid-article CTA If you need a procurement-ready package or a technical consultation on the canopy–PV interface, contact our team: /inquiry or info@carportiva.com.
Site installation and operations
Installation sequencing and key activities
- Pre-installation: verify foundations and embed positions, confirm anchor bolts and templates, receive and confirm all components against packing lists.
- Structural erection: erect main frames, cross-members and rails per supplier erection drawings. Check plumb, level and alignment before tightening final bolts.
- Racking and module installation: install module rails, clamps and modules. Apply specified torque to module clamps and document torque readings.
- Electrical installation: install DC combiner boxes, conduit, cable pulls, inverter mounting, AC conduit and final AC connections to site distribution point.
- Commissioning: perform continuity, insulation resistance, polarity checks, DC string IV curve or spot checks, inverter start-up and utility witness test.
- Handover: provide as-built drawings, commissioning records, manufacturer warranties and spare parts list.
Operational best practices
- Maintenance access planning: produce a maintenance plan that covers module cleaning schedules, inverter firmware upgrades, and routine inspections for anchors and coatings.
- Spare parts strategy: hold critical spares on site or nearby — module clamps, fuses, small inverter parts — to reduce downtime.
- Document control: maintain a single source of truth for drawings and O&M manuals in digital format, with version control and a log of any in-field changes.
- Training: require vendor training sessions for owner’s maintenance staff on safe working practices, module replacement procedures and inverter diagnostics.
Performance monitoring and yield verification
- Telemetry and SCADA: specify monitoring granularity (string, inverter, site) and reporting cadence to verify yield against pre-construction models [2].
- Baseline energy model: use pre-construction energy yield models as baseline; require an acceptance tolerance (for example, yield within X% after first 12 months) but set realistic expectations based on weather variability.
- Discrepancy process: define how discrepancies between expected and actual yield are investigated — shading, wiring errors, inverter settings, module mismatch — and how remediation will be funded.
Implementation risks and mitigations
Principal risks and recommended mitigations
- Risk: Structural mismatch between canopy and rack attachments.
- Mitigation: Require interface drawings, anchor details, and a structural engineer’s approval for the assembled system. Use proof-load tests where soils are uncertain.
- Risk: Cable routing clashes or insufficient pathways causing on-site rework.
- Mitigation: Create clear electrical pathway planning drawings and reserve conduit capacity during civil works. Coordinate with other trades early.
- Risk: Utility interconnection delays or unanticipated relay requirements.
- Mitigation: Engage the utility early, provide a complete metering and protection proposal, and use experienced local interconnection engineers [4].
- Risk: Lead-time delays for modules and inverters.
- Mitigation: Lock purchase orders early with defined delivery windows; identify alternative suppliers and plan logistics.
- Risk: Incomplete maintenance access leading to longer downtime.
- Mitigation: Include maintenance access planning in the scope and require walk-downs with operations staff before final acceptance.
- Risk: Warranty disputes due to ambiguous commissioning.
- Mitigation: Define commissioning acceptance tests, witness requirements and documentation that triggers warranty start dates.
- Risk: Permit rejections for non-compliant structural or electrical submissions.
- Mitigation: Pre-apply with local authorities, include code-compliant documentation, and use local licensed engineers for sign-off.
Risk allocation advice
- Allocate risks to the party with the most control over the cause. For example, the canopy supplier controls structural fabrication risk; the PV EPC controls stringing and commissioning risk. Where risk cannot be cleanly allocated, price and contingency should reflect residual exposure.
Six-step buyer workflow (named)
"ASSET INTERFACE" six-step workflow — a practical sequence B2B buyers can adopt
- Assess & define
- Stakeholders: Identify owner, canopy vendor, PV vendor, EPC, utility and local authority.
- Deliverables: Project brief, RACI, site baseline documents (survey, geotech).
- Decision gates: Approved scope and budget envelope.
- Site survey & model
- Activities: Detailed shading study, soil bearing verification, service point confirmation, and preliminary energy yield modelling (use PVWatts/industry tools) [2].
- Deliverables: Shading diagrams, installed capacity target, geotech report.
- System concept & procurement package
- Activities: Create canopy and PV interface drawings, single-line diagrams, structural attachment details and procurement BOMs.
- Deliverables: Tender package for canopy and PV, specification of acceptance tests, maintenance access planning.
- Tender, evaluate & contract
- Activities: Issue tender, compare offers against common dataset, evaluate FAT and factory evidence, check vendor lead times and warranty terms.
- Deliverables: Signed contracts with RACI, delivery schedule and quality assurance plan.
- Deliver & commission
- Activities: FAT, site delivery checks, structural erection, PV installation, electrical commissioning and utility witness tests.
- Deliverables: Commissioning certificates, as-built drawings, warranty activation documents.
- Transfer to operations & monitor
- Activities: Handover O&M manuals, train operations staff, implement monitoring and maintenance schedules, hold spare parts.
- Deliverables: O&M plan, baseline yield reports, spare parts register.
Workflow checklist items (practical)
- Ensure each contract includes a complete interface drawing set.
- Require manufacturer traceability and FAT reports before shipping.
- Insist on witnessed commissioning tests and signed acceptance to activate warranties.
Related B2B sourcing terms
For the same project brief, buyers may also encounter these connected search terms: commercial solar procurement. They must be interpreted against the actual project scope rather than treated as independent technical guarantees.
FAQ
Q: Who is typically responsible for the canopy-to-PV structural interface? A: Responsibility should be defined contractually via a RACI. Typically, the canopy supplier provides structural capacity and anchor plates to a stated tolerance; the PV supplier provides racking and modules sized to mount directly to those anchors. The EPC may be responsible for final on-site alignment and torqueing. Assign responsibilities clearly in procurement documents.
Q: How do I verify the canopy can support my PV array? A: Require structural calculations from the canopy supplier and a licensed local structural engineer’s review on a documented project basis. For critical anchors, consider proof-load testing after installation. Site-specific structural capacity and foundation suitability need geotechnical confirmation.
Q: How should I plan electrical pathways for long strings and multiple inverters? A: Use electrical pathway planning to map DC and AC routes with conduit fill calculations, bend radii, and cable pull plans. Minimise DC cable runs by judicious inverter placement and consider MLPE where long DC runs are unavoidable.
Q: How to handle utility and permit interface? A: Engage the utility early to determine interconnection requirements and metering. Submit permit packages that include single-line diagrams and structural calculations. Utilities may have specific relay or telemetry requirements — document them and include time allowances in the schedule [4].
Q: What is PV equipment coordination and why is it critical? A: PV equipment coordination is the process of aligning module, inverter and balance-of-system specifications with the canopy design. It ensures module fit, string lengths, inverter siting and cable pathways all work together. Poor coordination increases rework and can affect energy yield.
Q: How do I factor maintenance access planning into procurement? A: Include maintenance access planning in the technical scope: specify clearances, ladder points, inverter accessibility and module replacement procedures. Require vendor-provided maintenance drawings and a training session for maintenance staff.
Q: Can I use standard canopy products for all sites? A: Standard products reduce cost but must be validated against site-specific wind, snow, soil and operational requirements. Where site criteria differ, adapt or engineer the canopy. Site-specific verification by local engineers is required.
Q: What tests should be performed before handing over the system? A: FAT documentation review, structural alignment checks, torque verification of clamps, DC insulation and polarity checks, DC string IV or spot checks, inverter commissioning, earthing resistance tests and utility metering verification.
Q: How should warranties be structured around the interface? A: Warranties should be tied to documented commissioning and acceptance. Specify what triggers vendor liability (signed commissioning, acceptance tests) and include a defects period with defined remedies. Clarify which vendor covers consequential losses, if any.
Q: Where can I get authoritative solar resource and performance modelling information? A: NREL provides comprehensive solar resource data and modelling guidance [1]; PVWatts is a reliable tool for preliminary yield estimates [2].
Conclusion
Evaluating the commercial solar canopy pv interface requires treating the interface as an engineered system boundary — not a checklist item. Effective buyers collect complete site inputs, require structurally sign-offed designs, enforce PV equipment coordination, and plan electrical pathways early. Utility and permit interface must be managed proactively and maintenance access planning must be designed into deliverables from day one. Procurement should require factory evidence, FATs and a clear RACI for interface responsibility. Finally, always confirm that site-specific structural capacity, foundations, permits, electrical design, approvals, lead time, price, energy yield and warranty require a documented project basis and relevant local qualified professionals, installers, utilities and authorities.
Closing CTA For technical procurement support, tender documents or a project review focused on the canopy–PV interface, contact us: /inquiry or info@carportiva.com.
Further reading and authoritative resources
- NREL Solar resources and tools [1].
- PVWatts for preliminary energy yield estimates [2].
- U.S. Department of Energy AFDC resources on EV charging and integration planning [3].
- FERC interconnection guidance and resources [4].
References
- National Laboratory of the Rockies PV resources: https://www.nrel.gov/solar/
- PVWatts Calculator: https://pvwatts.nrel.gov/
- U.S. Department of Energy Alternative Fuels Data Center: https://afdc.energy.gov/
- Federal Energy Regulatory Commission interconnection resources: https://www.ferc.gov/electric-transmission/generator-interconnection
Keep the project brief connected.
Bring the actual project brief to the engineering table.
Share your location, layout, target application and available technical inputs. Carportiva can help identify the relevant product-interface information before a project-specific commercial discussion.
Request a project discussion